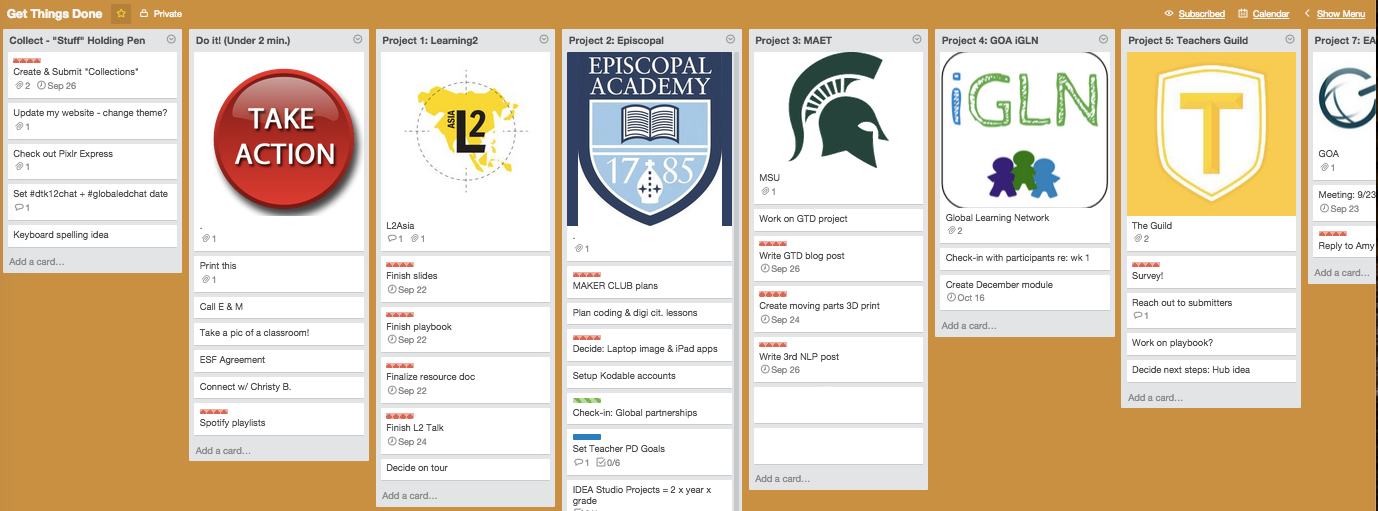
Monthly Archives: September 2015

Get Things Done with Trello

Trello_GTD_Board

My Trello GTD Board

I had a chance to learn more about the Get Things Done (GTD) method created by David Allen this week in my MSU course Teaching for Understanding with Technology. I’ve heard of the GTD method before and even tried exploring it on my own but I always found the process a bit overwhelming.

A view of the calendar

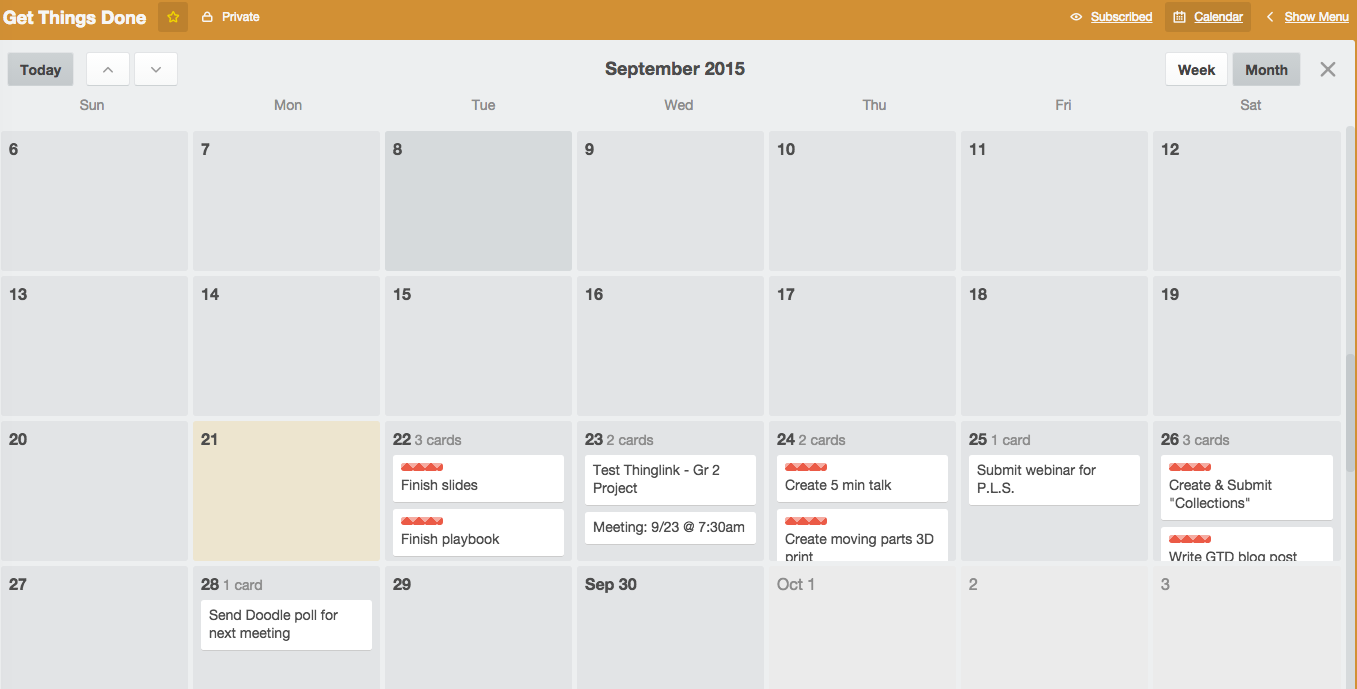
A view of my Trello GTD calendar

I already incorporate a number of different tools (e.g., Evernote, Google Apps, Pinterest, etc) in my workflow to increase productivity but I often find myself reverting to the Mac Stickies app to collect to-do’s and prioritize tasks. Last year, I started playing around with Trello because I liked the visual nature of it and the way it integrates a calendar, checklists, and attachments like Google docs or links. Initially, I setup my Trello using this seven step process but I found it hard to sustain. I realized that I needed to better organize the various projects I’m involved with before figuring out which things to work on each day. Here’s the new system I created:

Collect:
Throughout the day, quickly add cards manually or even via email to the “Stuff” Holding Pen list.

Organize:
At the beginning and end of each day, review the Collect list and organize the cards into their respective project lists or the “Do it!” list if it is a task that takes under two minutes. If it’s a non-actionable item, I’ll add it to one of my Pinterest boards or Evernote, my two main places where I store resources and ideas to revisit later.

Process:
Once tasks are distributed among the project lists, I’ll jump into tackling the actions that take less than two minutes. Then, I’ll give items in my project lists that are a top priority (due in the next 2-4 days) a red label so I’ll know to work on them. Finally, it will be time to get to work on my projects!

I do wish Trello somehow let you have recurring tasks and also cards inside of cards because some projects involve so many actions. I’m excited to see how my new system works over the next few weeks and I’ll try to post an update here to share my experience.

References

Allen, D. (2001). Getting things done: The art of stress-free productivity. New          York: Penguin.

Advertisement

Adventures in 3D Printing

The past two weeks have been filled with exciting and challenging adventures in 3D Printing as I tried to achieve my first Networked Learning Project goal: make a sign.

I started by watching some beginner Tinkercad videos and then searching YouTube for any videos about making 3D printed signs in Tinkercad. I couldn’t find anything that was an exact match but I did find videos about making keychains and nametags. After watching them, I opened up Tinkercad and started working on my own design. It was great to be able to go back and rewatch parts of a video in one tab and jump back to my work in Tinkercad in another tab. I started by grouping a cylinder and a square together and then inserting a “round roof” shape as a hole in the cylinder. This created a little handle which would make it easy to hang the sign. Next, I added another thin square as a background for my words and finally, I inserted letters for the sign text.

My Tinkercad design and then final product!

I also found a really helpful video with Tinkercad keyboard shortcuts that I’ve watched a few times already. It made it much easier to navigate and make edits on the site. I started to compile all of the videos I watched and learned from in a Tinkercad YouTube Playlist so it would be easy to go back and watch them again and find (and share!) them for future reference.

I really wanted to see if I could use multiple colors of plastic in my sign but I had never done that in one print. I could not find an easy way (I hope to follow-up about this in a help forum) to tell when the print was hitting different layers so I ended up just watching it closely and pausing the print when I thought it was finished with one part (e.g., the foundation) and then changing the filament and restarting the print. This worked beautifully the first time but the second time I tried it I ran into a known issue with the Makerbot Replicator 5th Gen – the extruder (where the plastic is heated and comes out) gets clogged and there’s no way to open the extruder and clear it. The likelihood of this seems to increase when you change filaments.

Changing the Extruder

Changing the Extruder

I was able to pause the print and remove the filament when the extruder first became clogged and actually swap in a new extruder I had on hand. Unfortunately, that extruder also had problem, it was leaking filament! Even though I had not restarted the print, purple filament was slowly streaming out. Now, I was in a bind because I did not have another extruder to swap in. I decided to reach out to my local network (the other Tech Coordinators at my school) and ask if they had an extra extruder I could borrow. We’re fortunate enough to have a Makerbot in our Lower School, Middle School, and Upper School so there was a chance my project would be saved! Otherwise it could be weeks before I could finish the print. Thankfully, one of them did have a new extruder and I was able to put it in and successfully finish the print!

YouTube has been a very useful resource so far in this project. I am a visual learner and it’s helpful to be able to watch something, hear it explained, then go back and watch it again if I want, pausing to look closer at exactly how something is working. I’m excited to work on my next two goals, making something practical with the 3D printer and printing something with moving parts.